
Is your living room aesthetic McDonalds play place too? Well I am on a mission to create a more organized space.

That is why I am building a toy storage/ book shelf to bring some order to the chaos. It will provide the functional solution we need.
I got tired of buying cheap toy bins and trying to figure out where to put all my toddlers’ books
So instead I created something that solved both these problems.
Come with me as I build a toy/book storage solution for our living room
Building The Frame
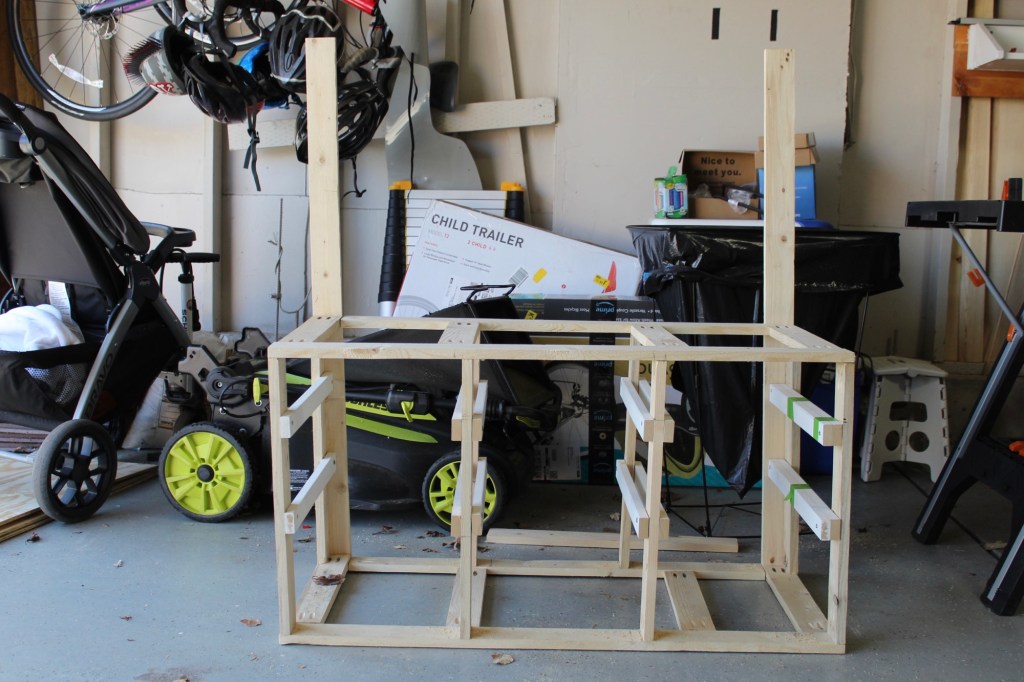
First I picked out all the wood for the framing. I planned out all my cuts.
I labeled all my cuts and organized them by size so I was able to easily assemble them. Then I made about a million pocket holes on all the pieces. The good part about being short is I can fit inside the frame to drill in the joints. I got the frame mostly done in one weekend
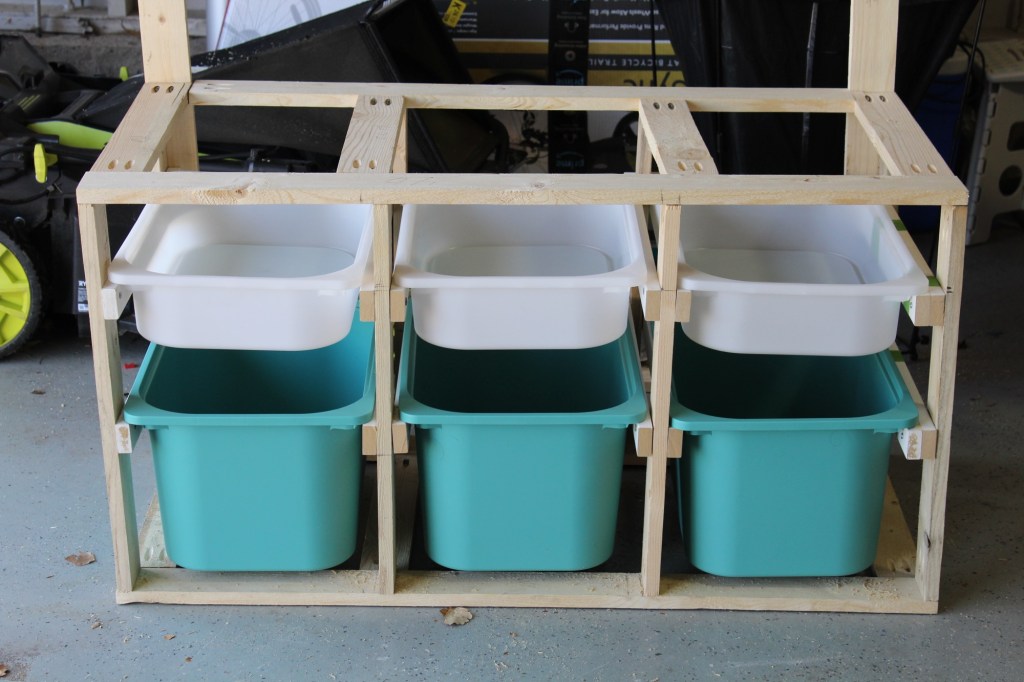
Building The Shelves
I built the shelves for the containers to sit. Figuring out the spacing was a little harder than I thought. I eventually achieved the desired symmetry and straightness, ensuring a sturdy foundation for the containers to sit. I dryfit with the containers as I went along to make sure the spacing was accurate.

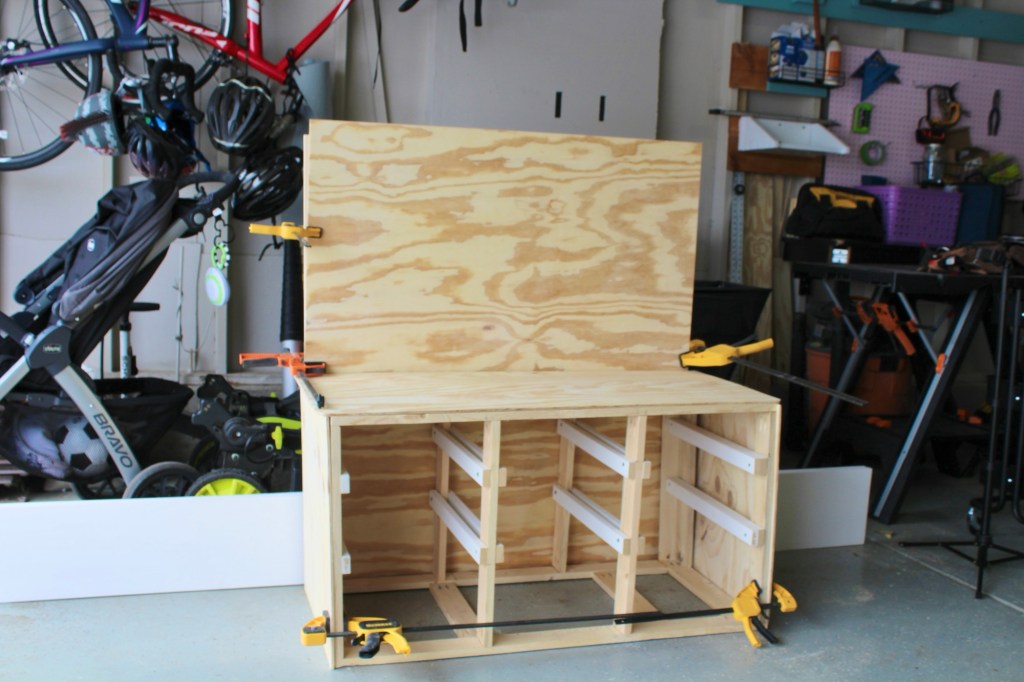
Cut and Dry Fit The Panels
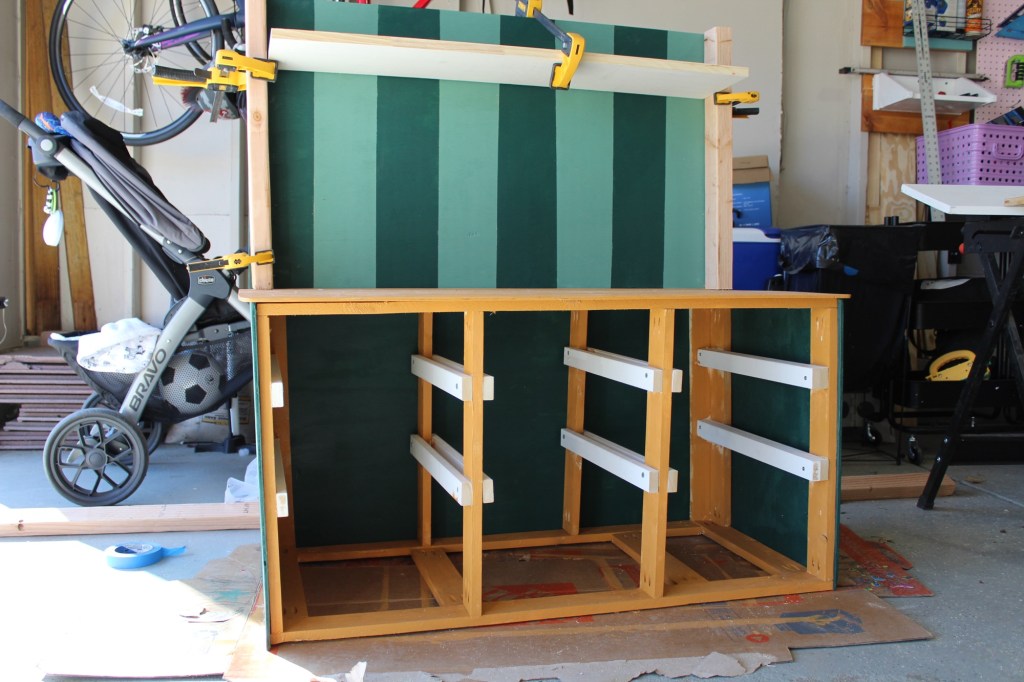
I cut and connected the panels to the frame with vice grips to dry fit them first to make sure they were all the correct sizes and fit together. I didn’t want to permanently attach them yet because I am going to paint all the panels separately first. That way I can get the best paint coverage.
Cut Round Corners
I wanted to make round corners on the table top because you know kids and sharp corners
This was my first time doing this and they came out so good. The key to making the corners was making a template first. I then laid my template on the corner and cut off the table top edge with my router. The template was the same width as the top of the router bit so the teeth only hit the bottom table top.
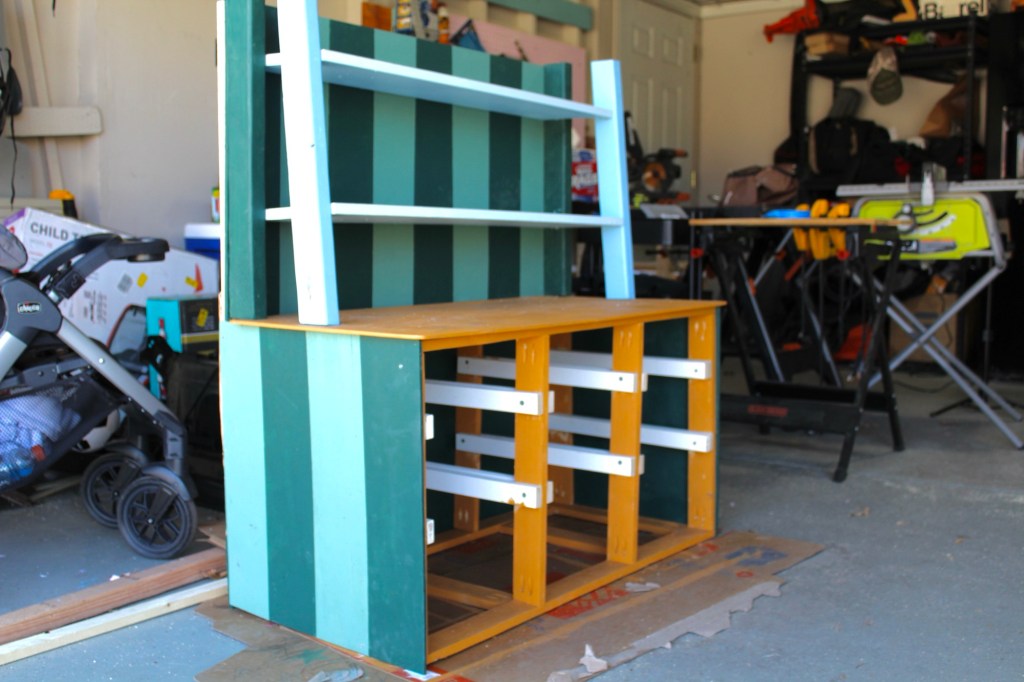
Building The Bookshelf
I started on the book shelf. I wanted it to be cascading, kind of like a staircase so I cut one MDF piece 8” wide and one 10” wide for the shelves. I cut the front legs at a 5 degree angle on the bottom so it would have a slight staircase like slant in the front.
I painted the legs with Bluey themed colors.
I attached the back legs to the frame and then installed the shelves with the shorter width board on top.
I cut the front legs at a 5 degree angle on the bottom to give the cascading effect. I attached all the pieces together with pocket holes. I was so amazed that all fit together perfectly
Finishing Touches


I did some finishing touches to make it look a little more professional. I had this ugly wood sandwich situation happening on the sids so I came up with an idea to make panels to cover it up. It looks so much better. I added some extra shelf reinforcement underneath and did some paint touch ups and details.
Here is how it turned out

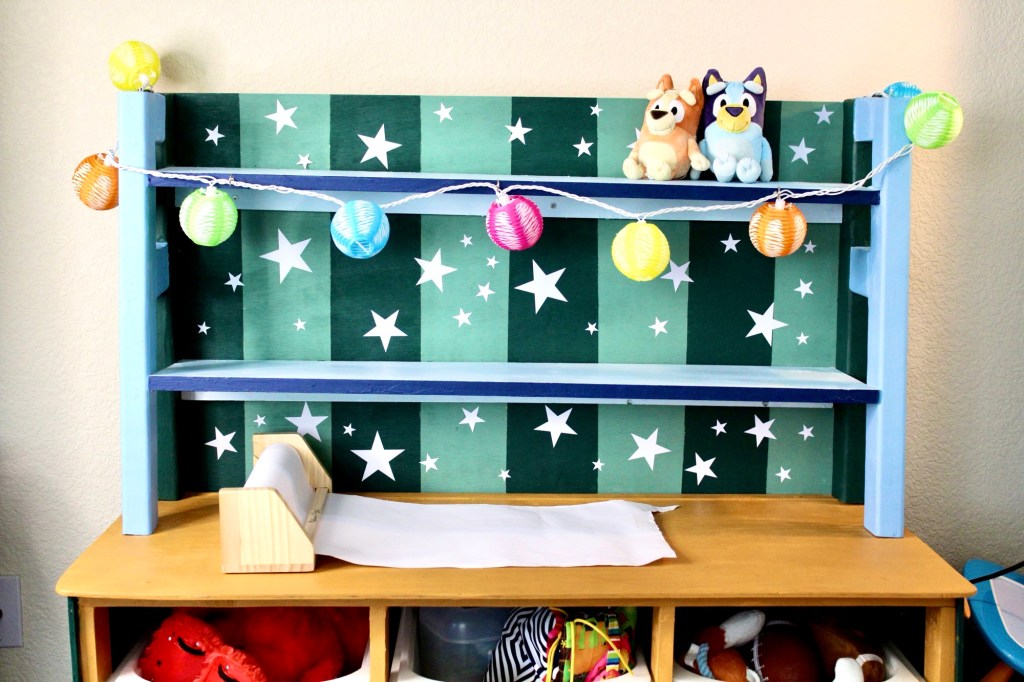
This is a perfect custom piece because it is not overly bulky and only takes up a small space in our living room.
It does however provide the perfect storage for all the Toys and Books that we have in our living room.
