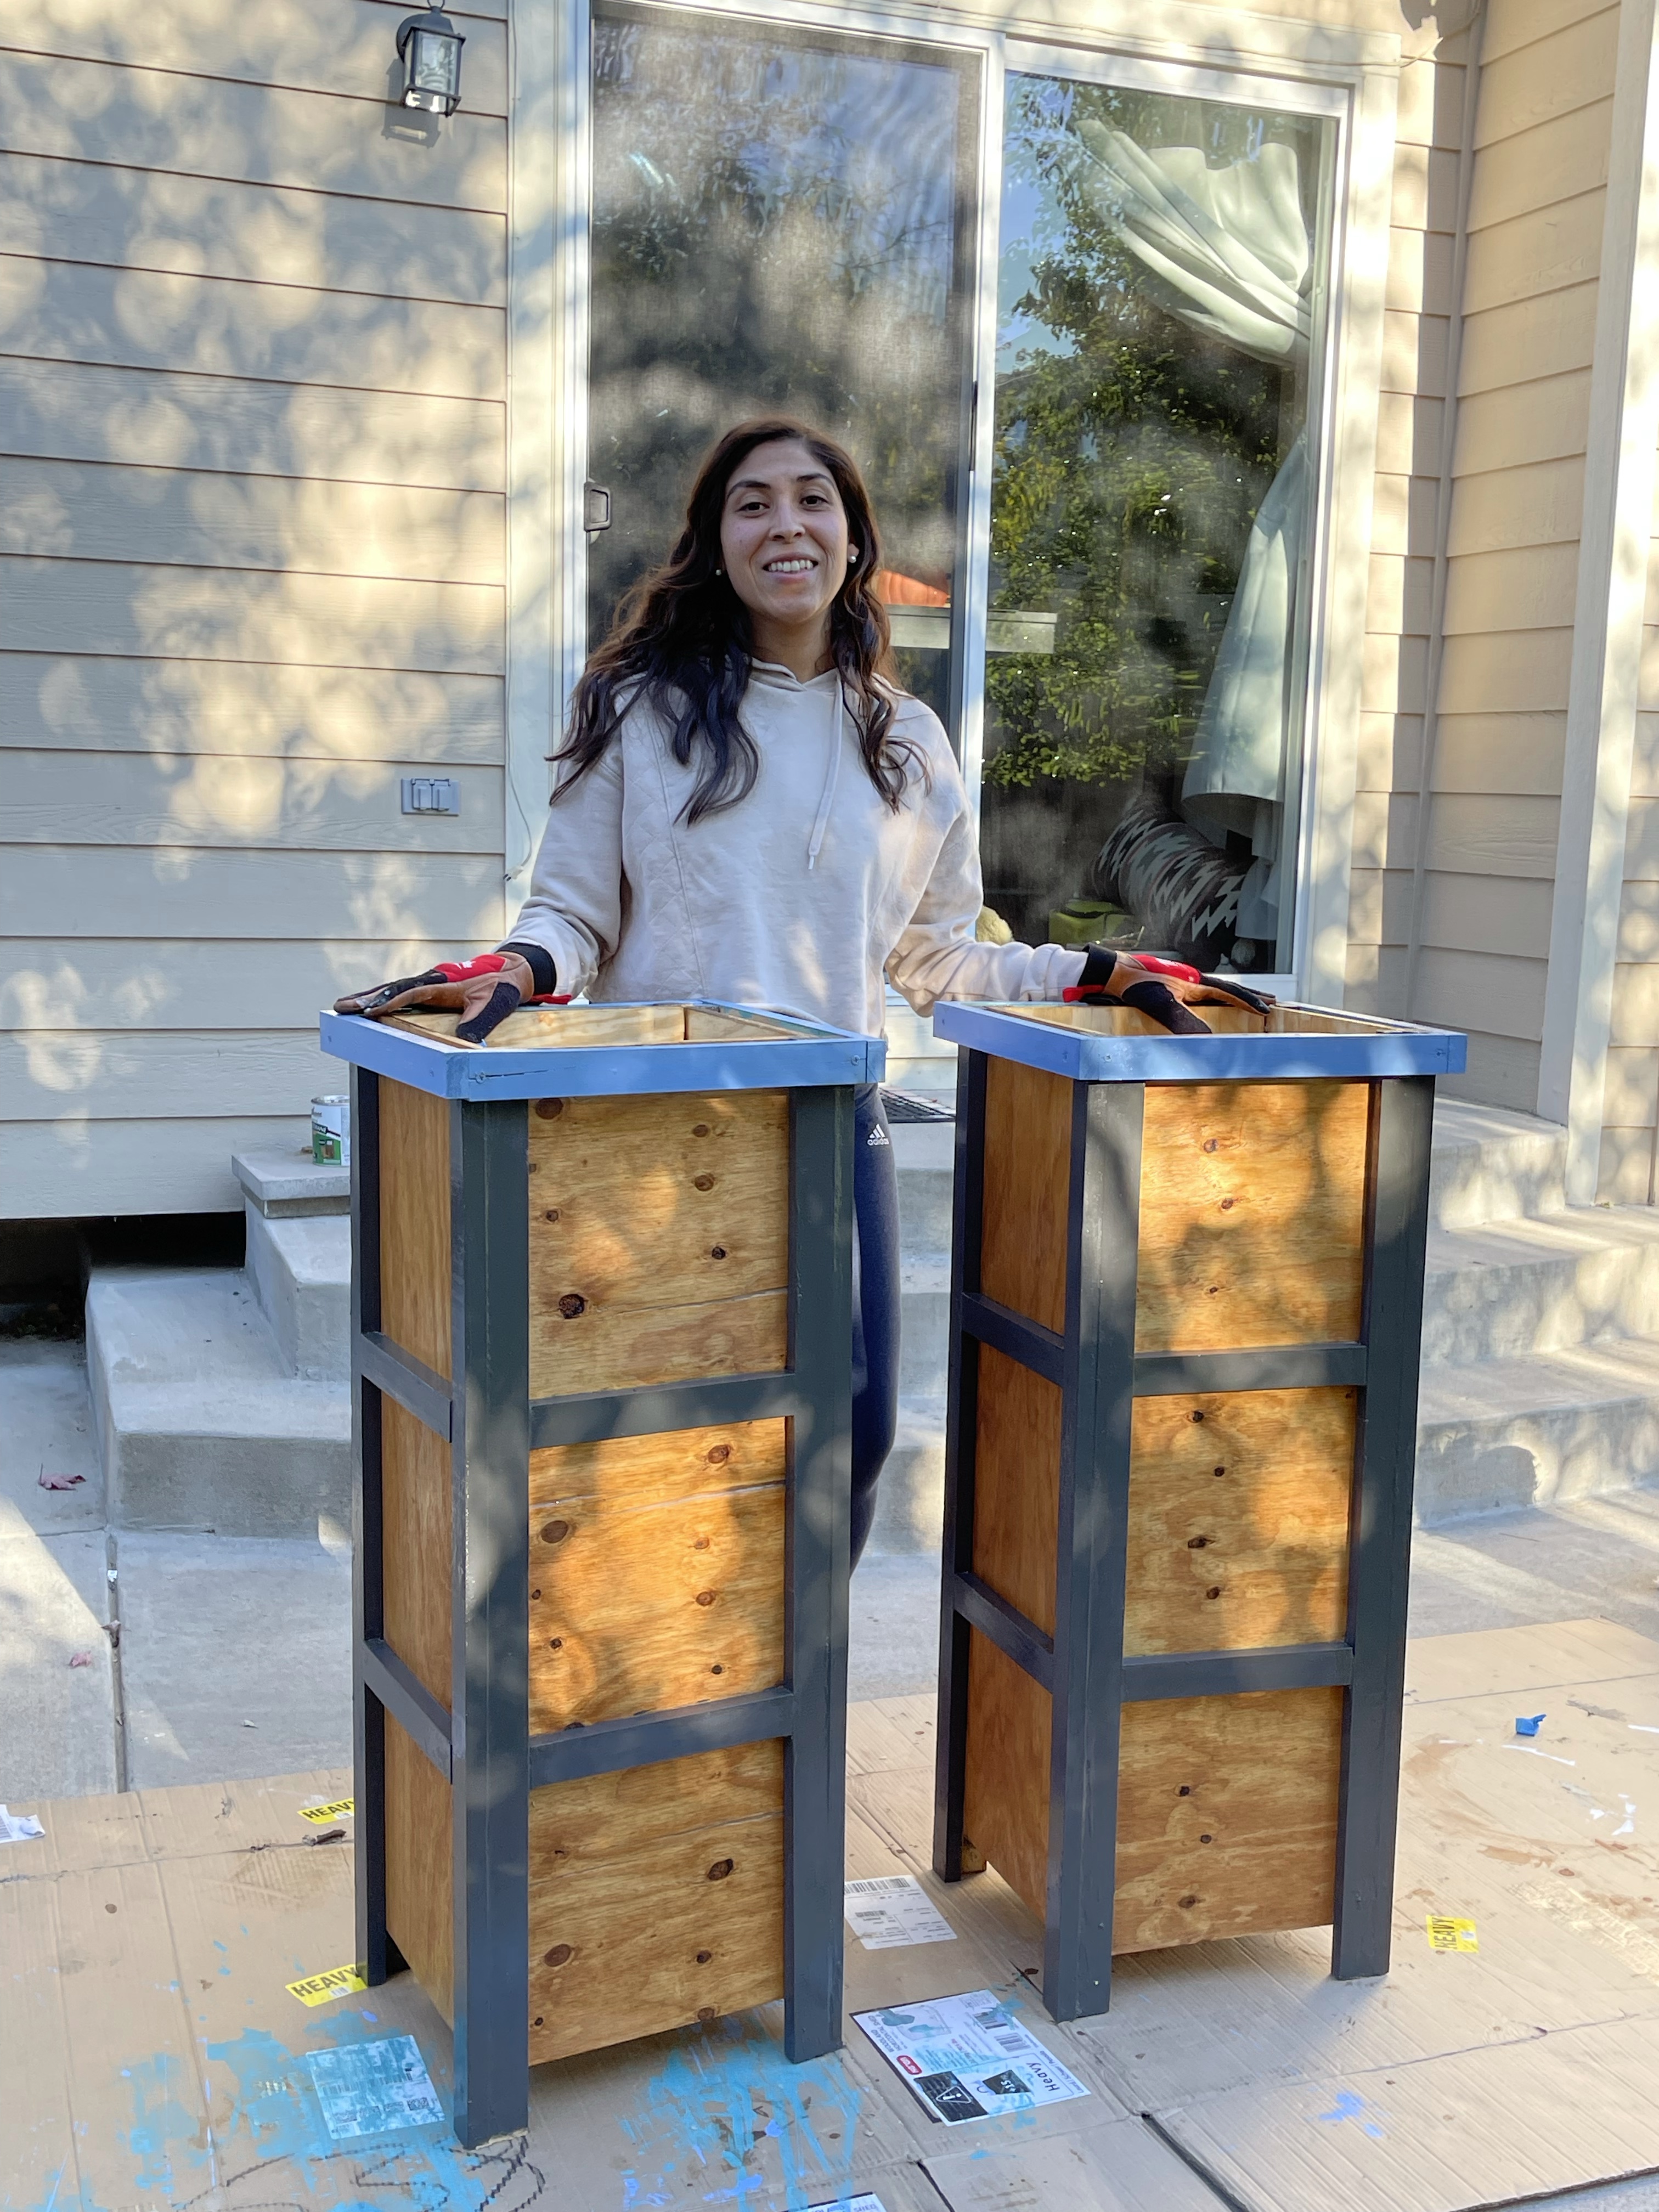
In part 2 How To Build a Planter Box: Phase 2: Assembling The Planters we assembled the planters. Now we are ready to attach the lip to give the planters a pop of color and then touch up all the gaps and touch up the paint
Create the Lip
I measured the 4 sides around the top of the planter to determine the lengths of the pieces I needed to cut to make the lip. I measured and cut my 4 pieces. I labeled all odthem again according to their corresponding panel, so I knew which panel they went with. I painted them Blue (Behr Mirror Lake) first and let them dry overnight. Then I attached them to the top of the planter with screws and wood glue. I glued first and used the Vice Grip to secure the pieces while I screwed in each side.

Fill In Gaps
I filled in the small gaps in the joints where the wood pieces met with wood filler. I let dry and sanded the excess with a small sanding block. Then I touched up the paint to create a more seamless look.

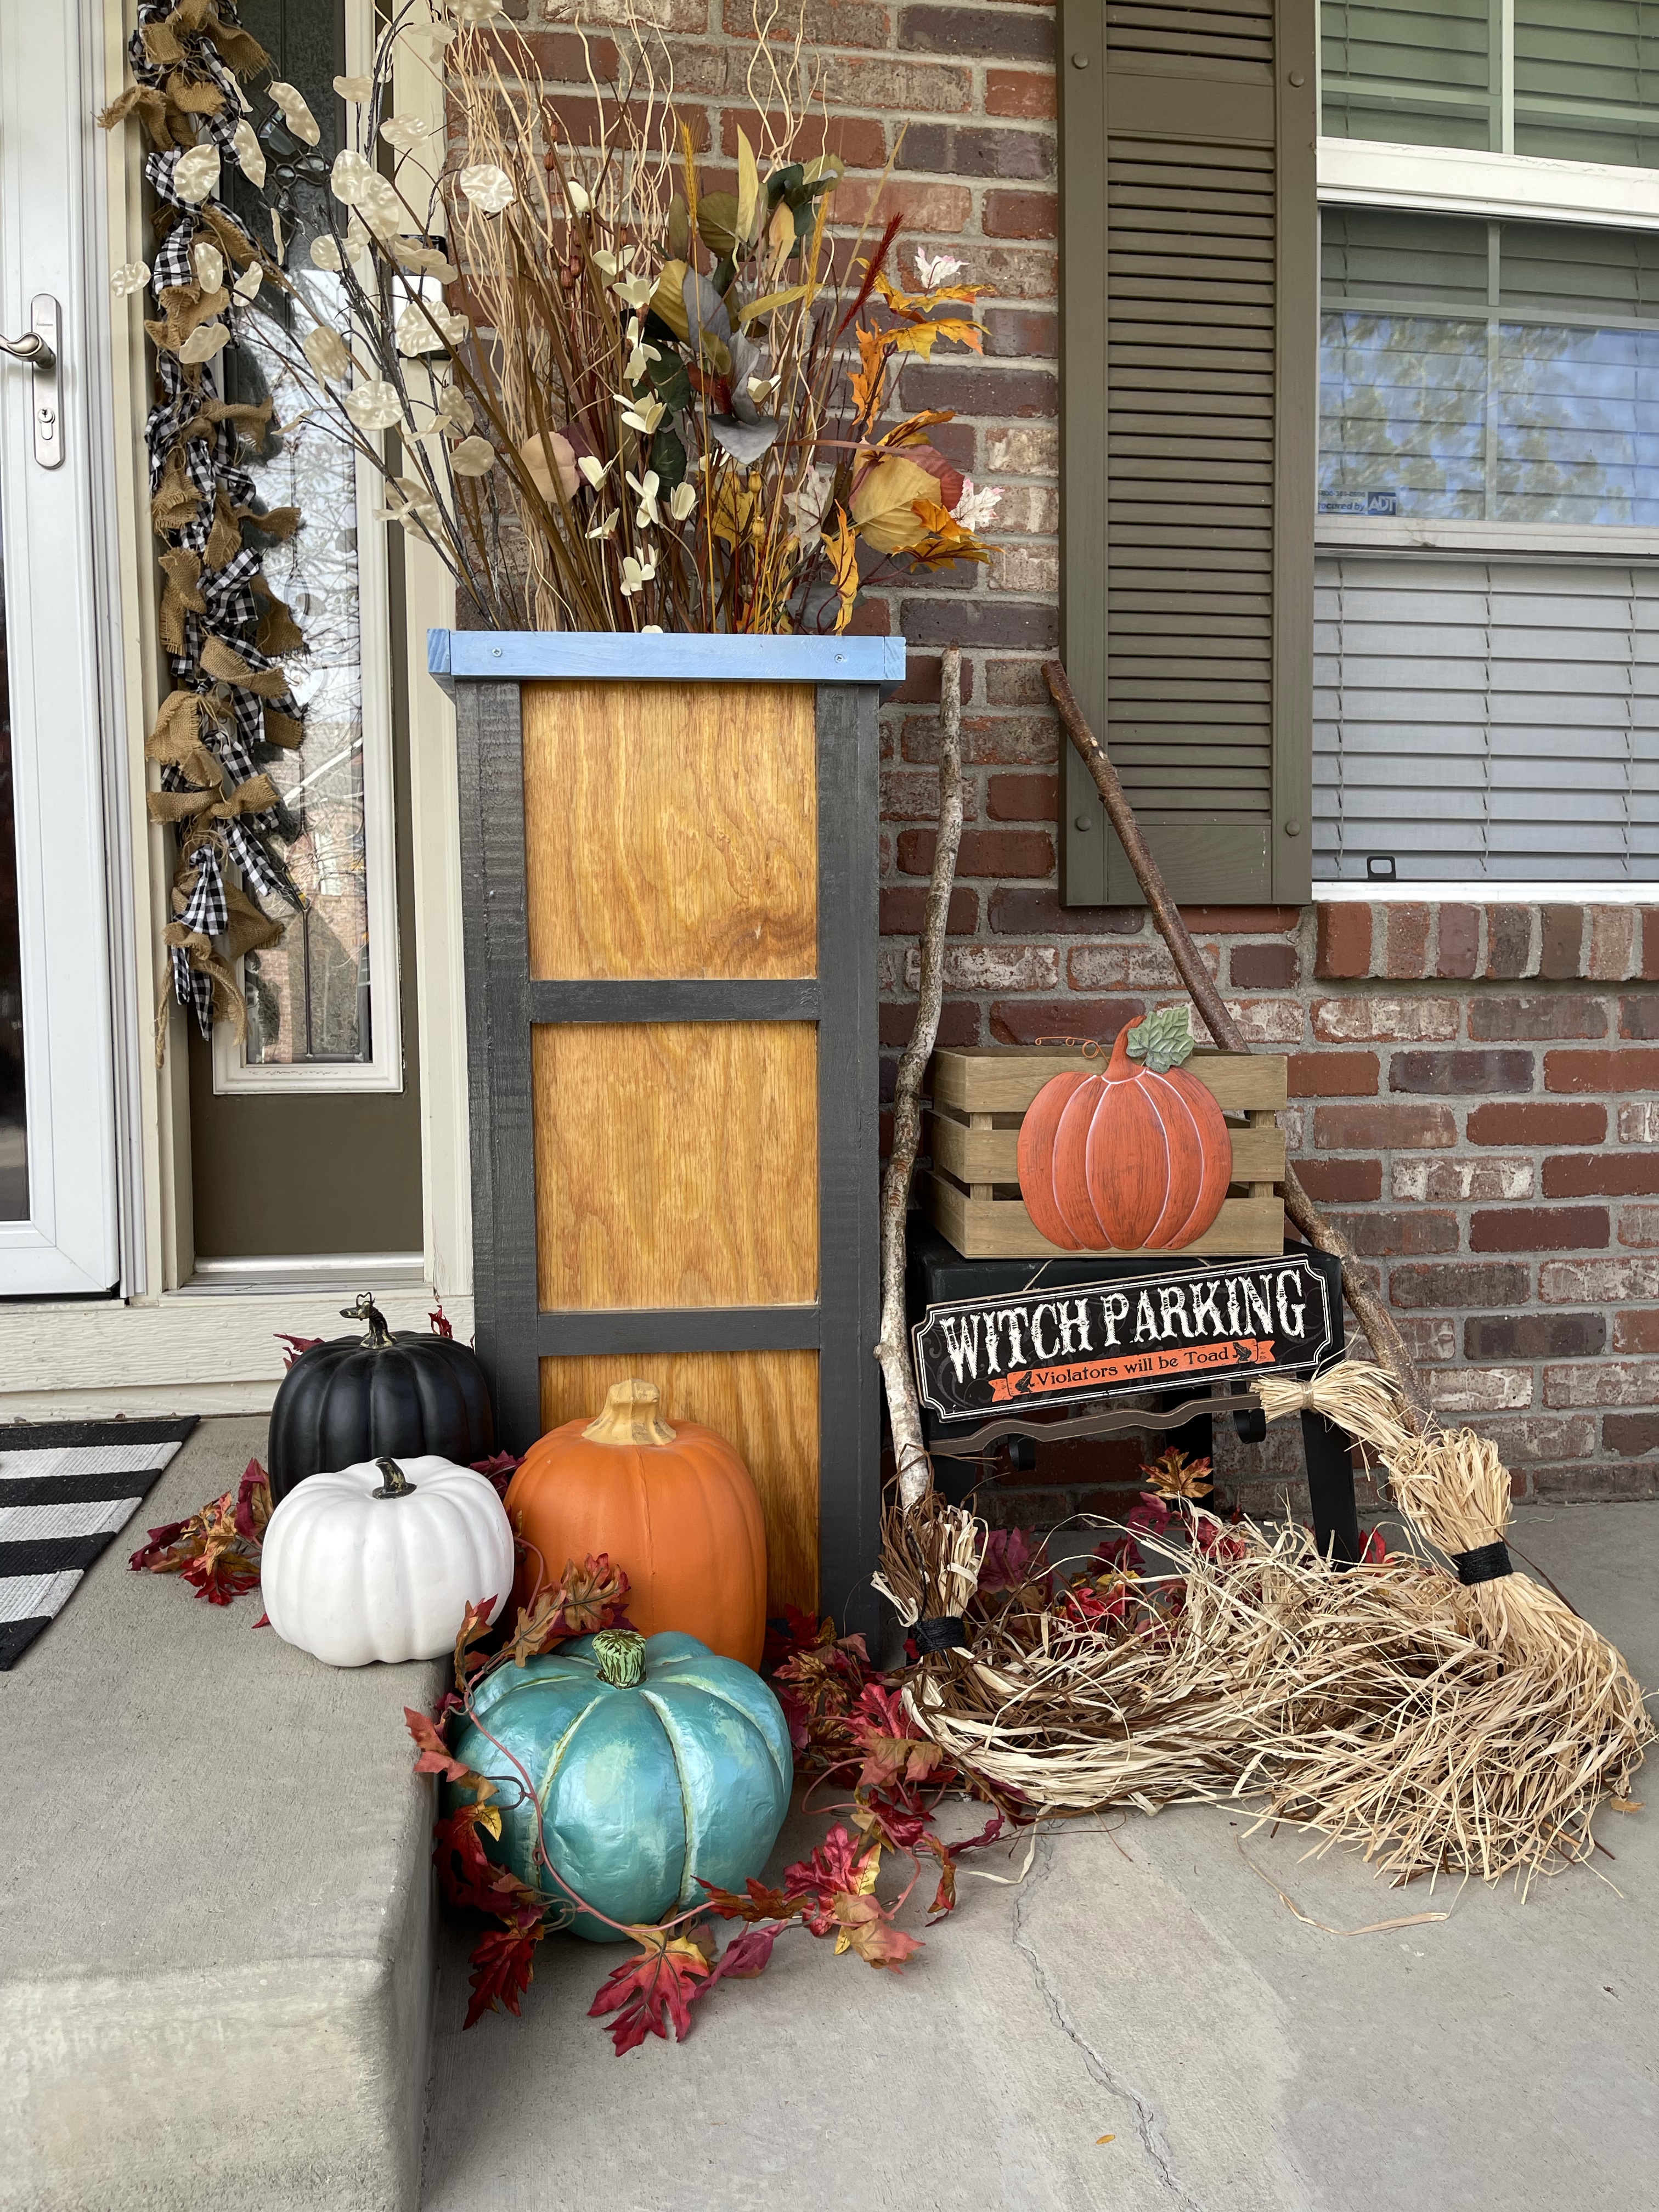
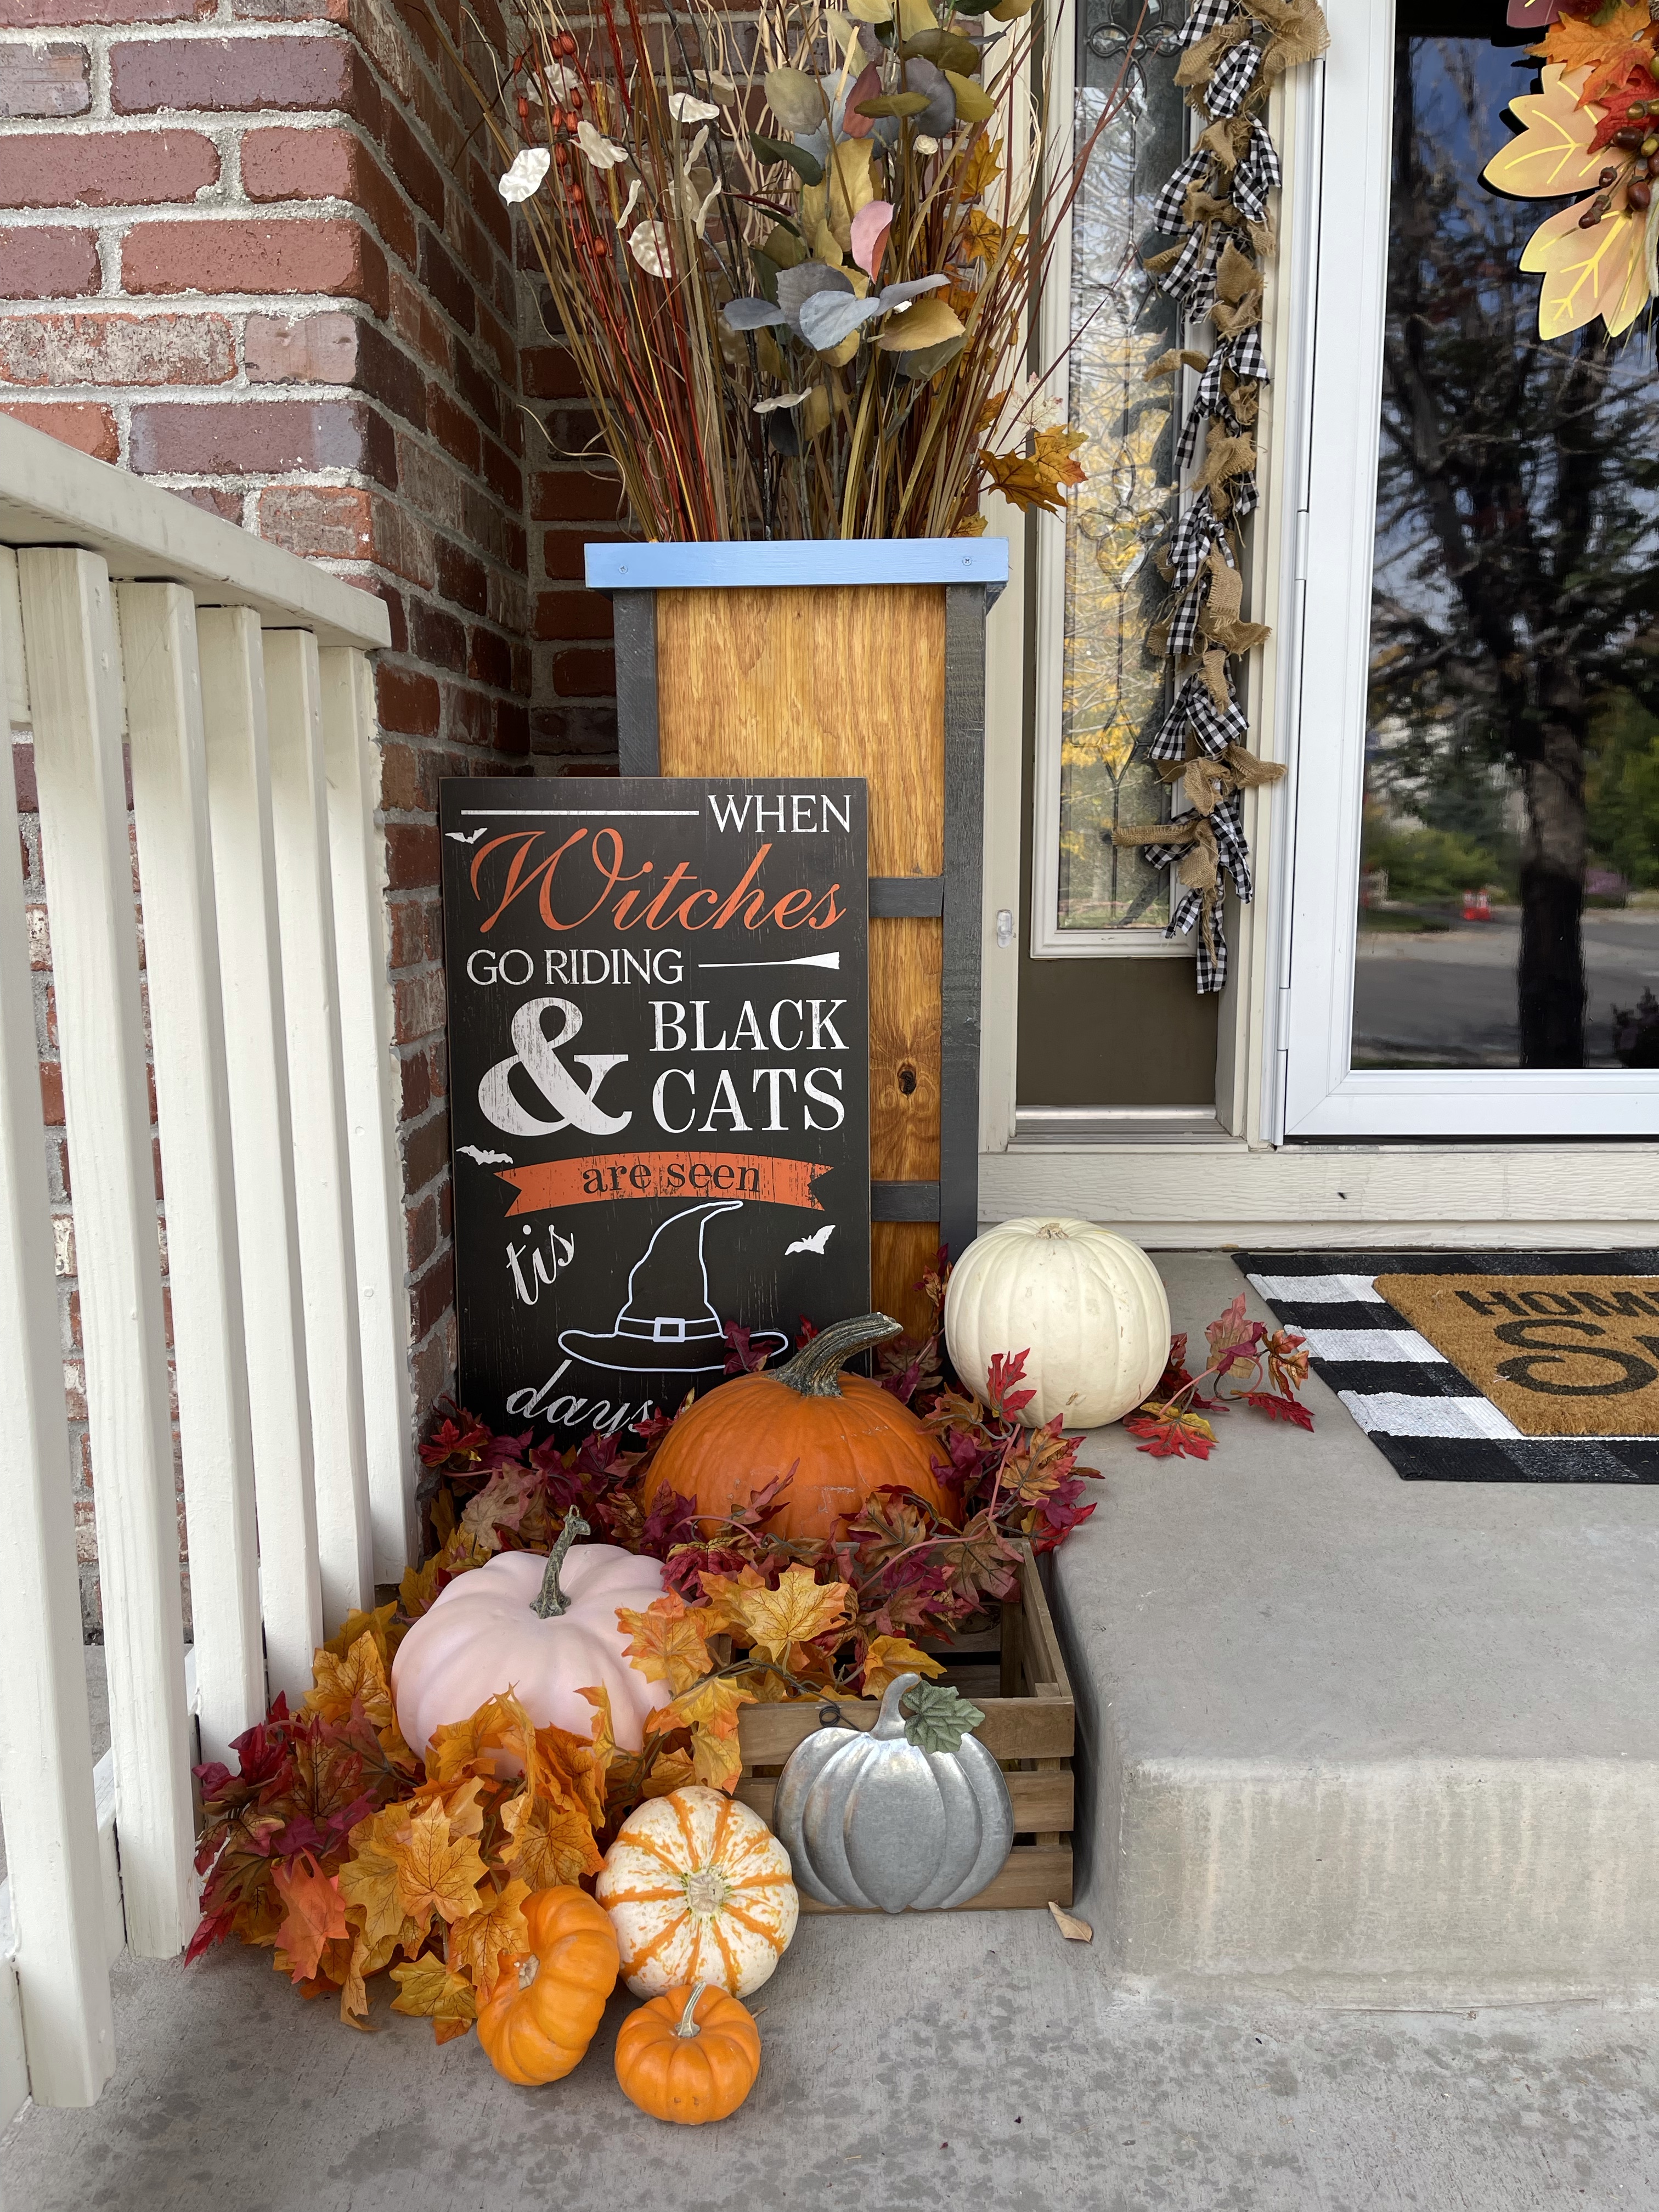
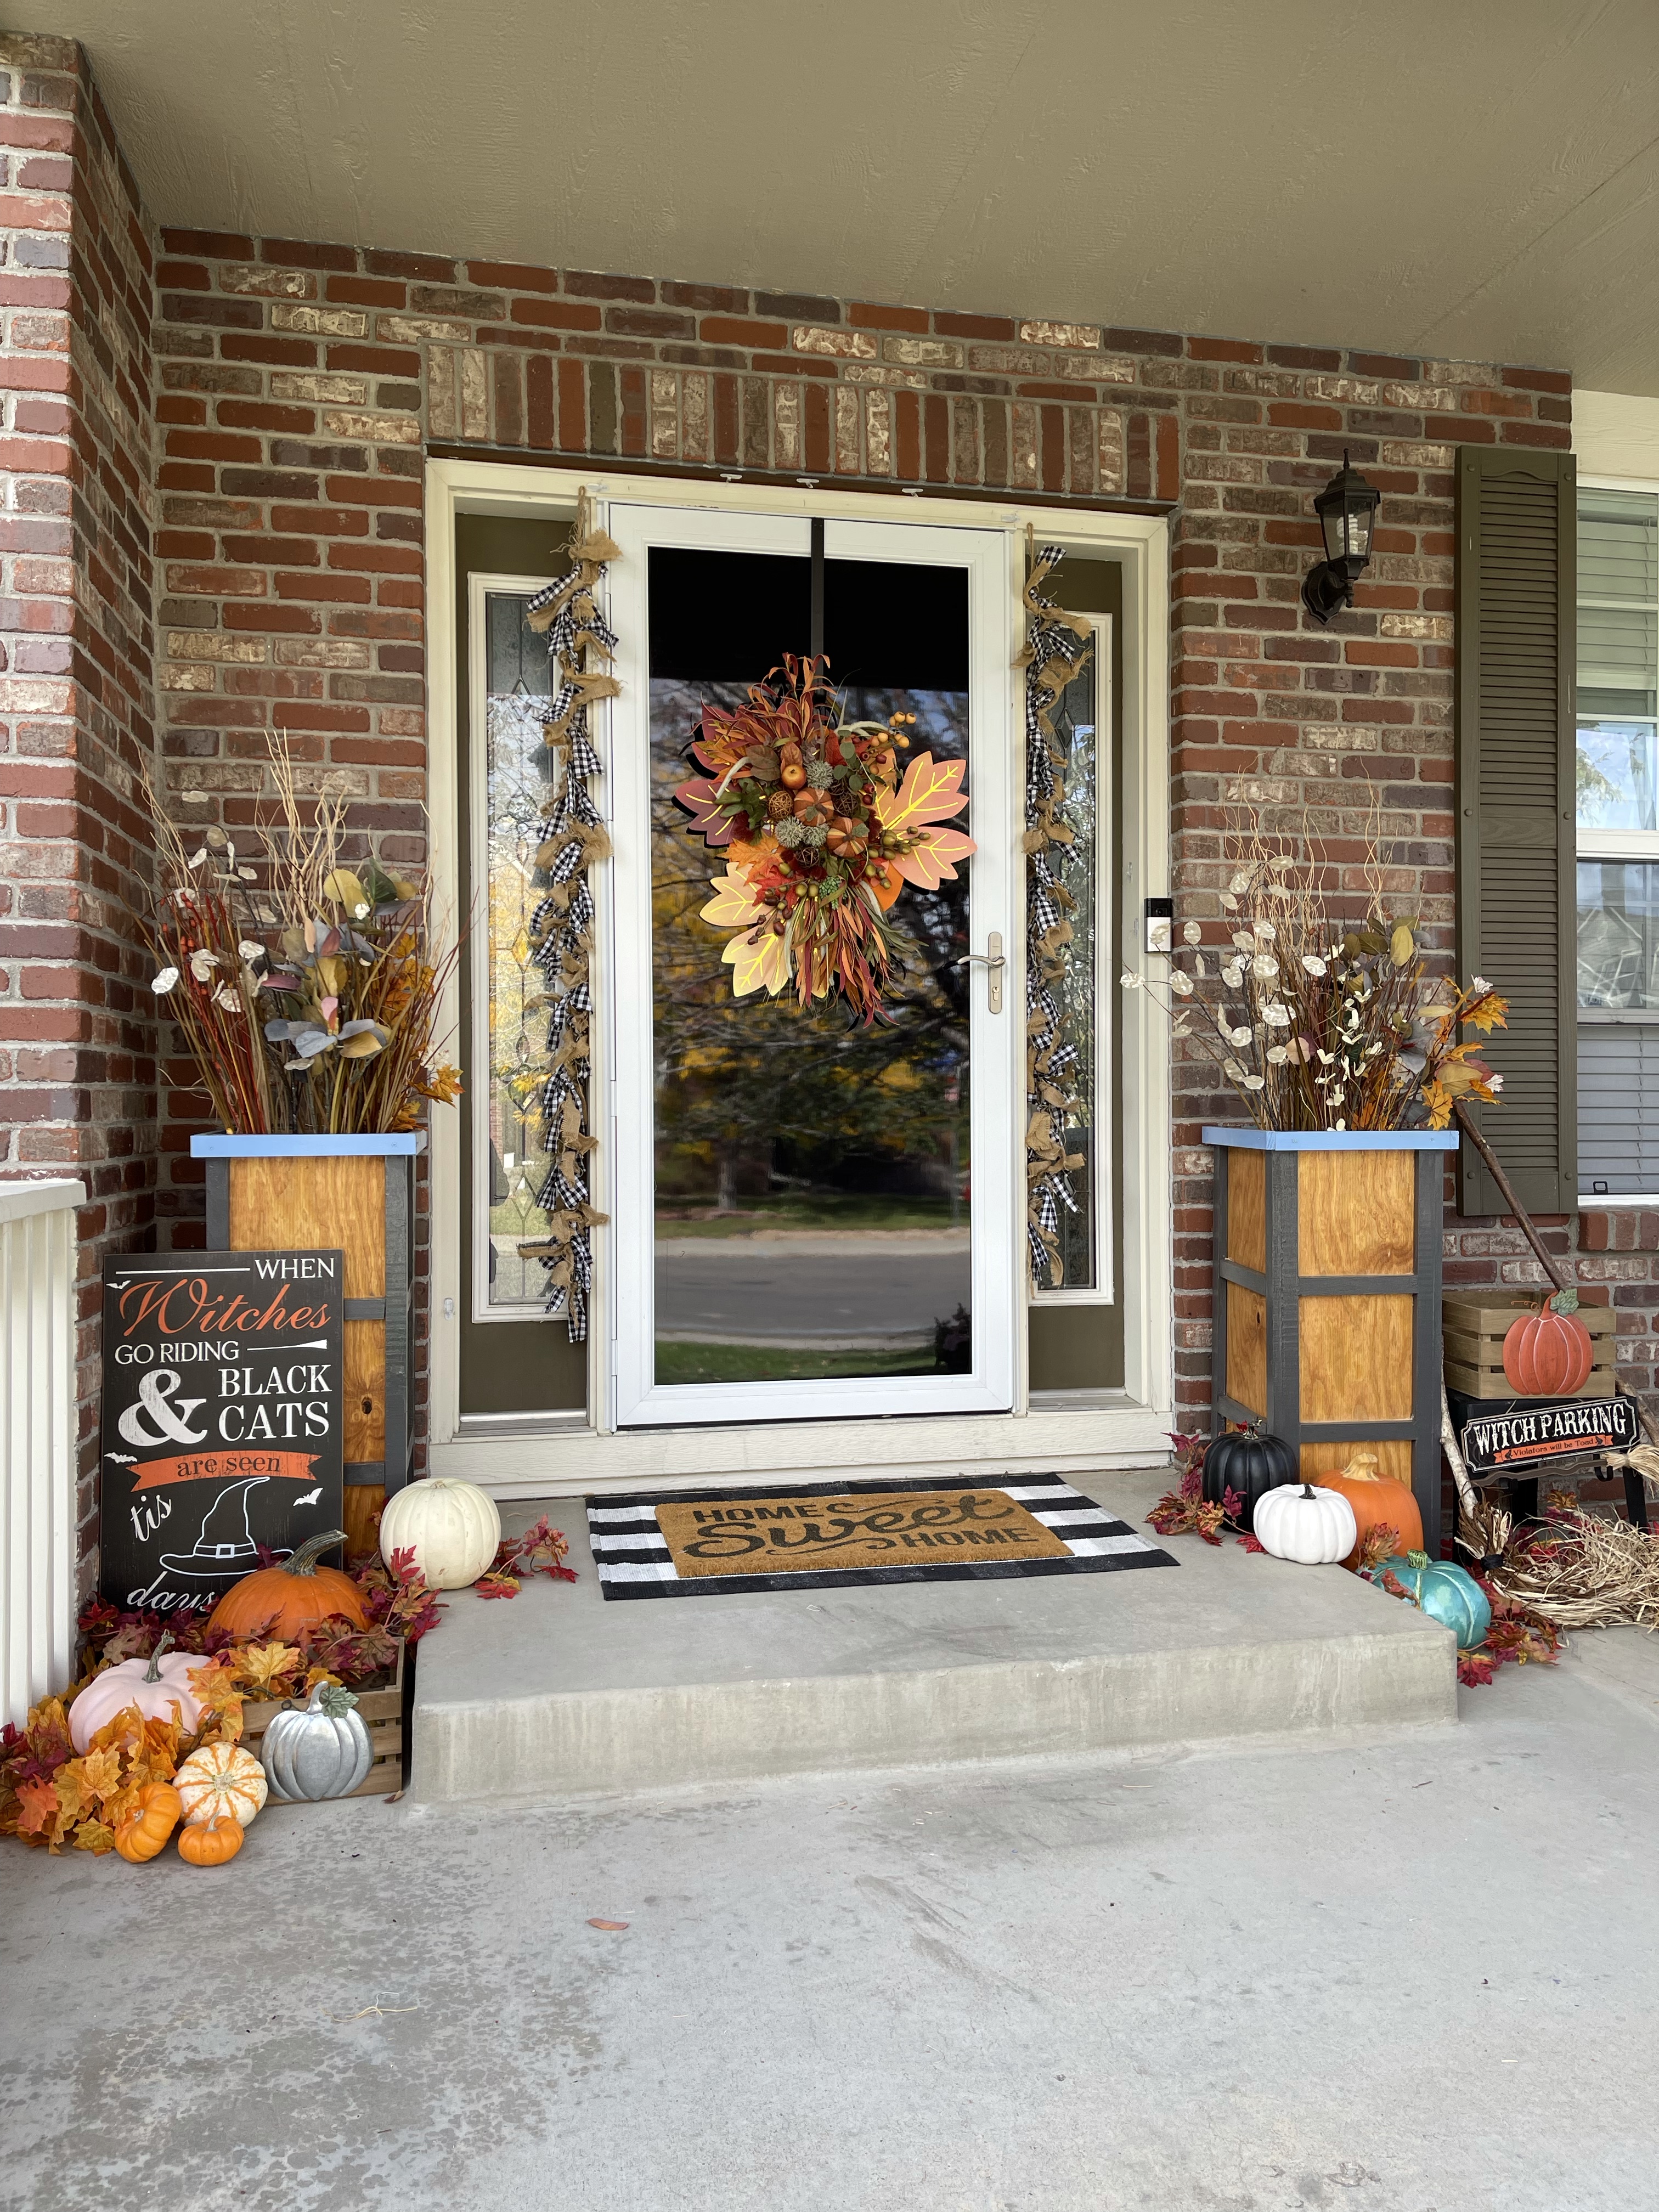
Decorating
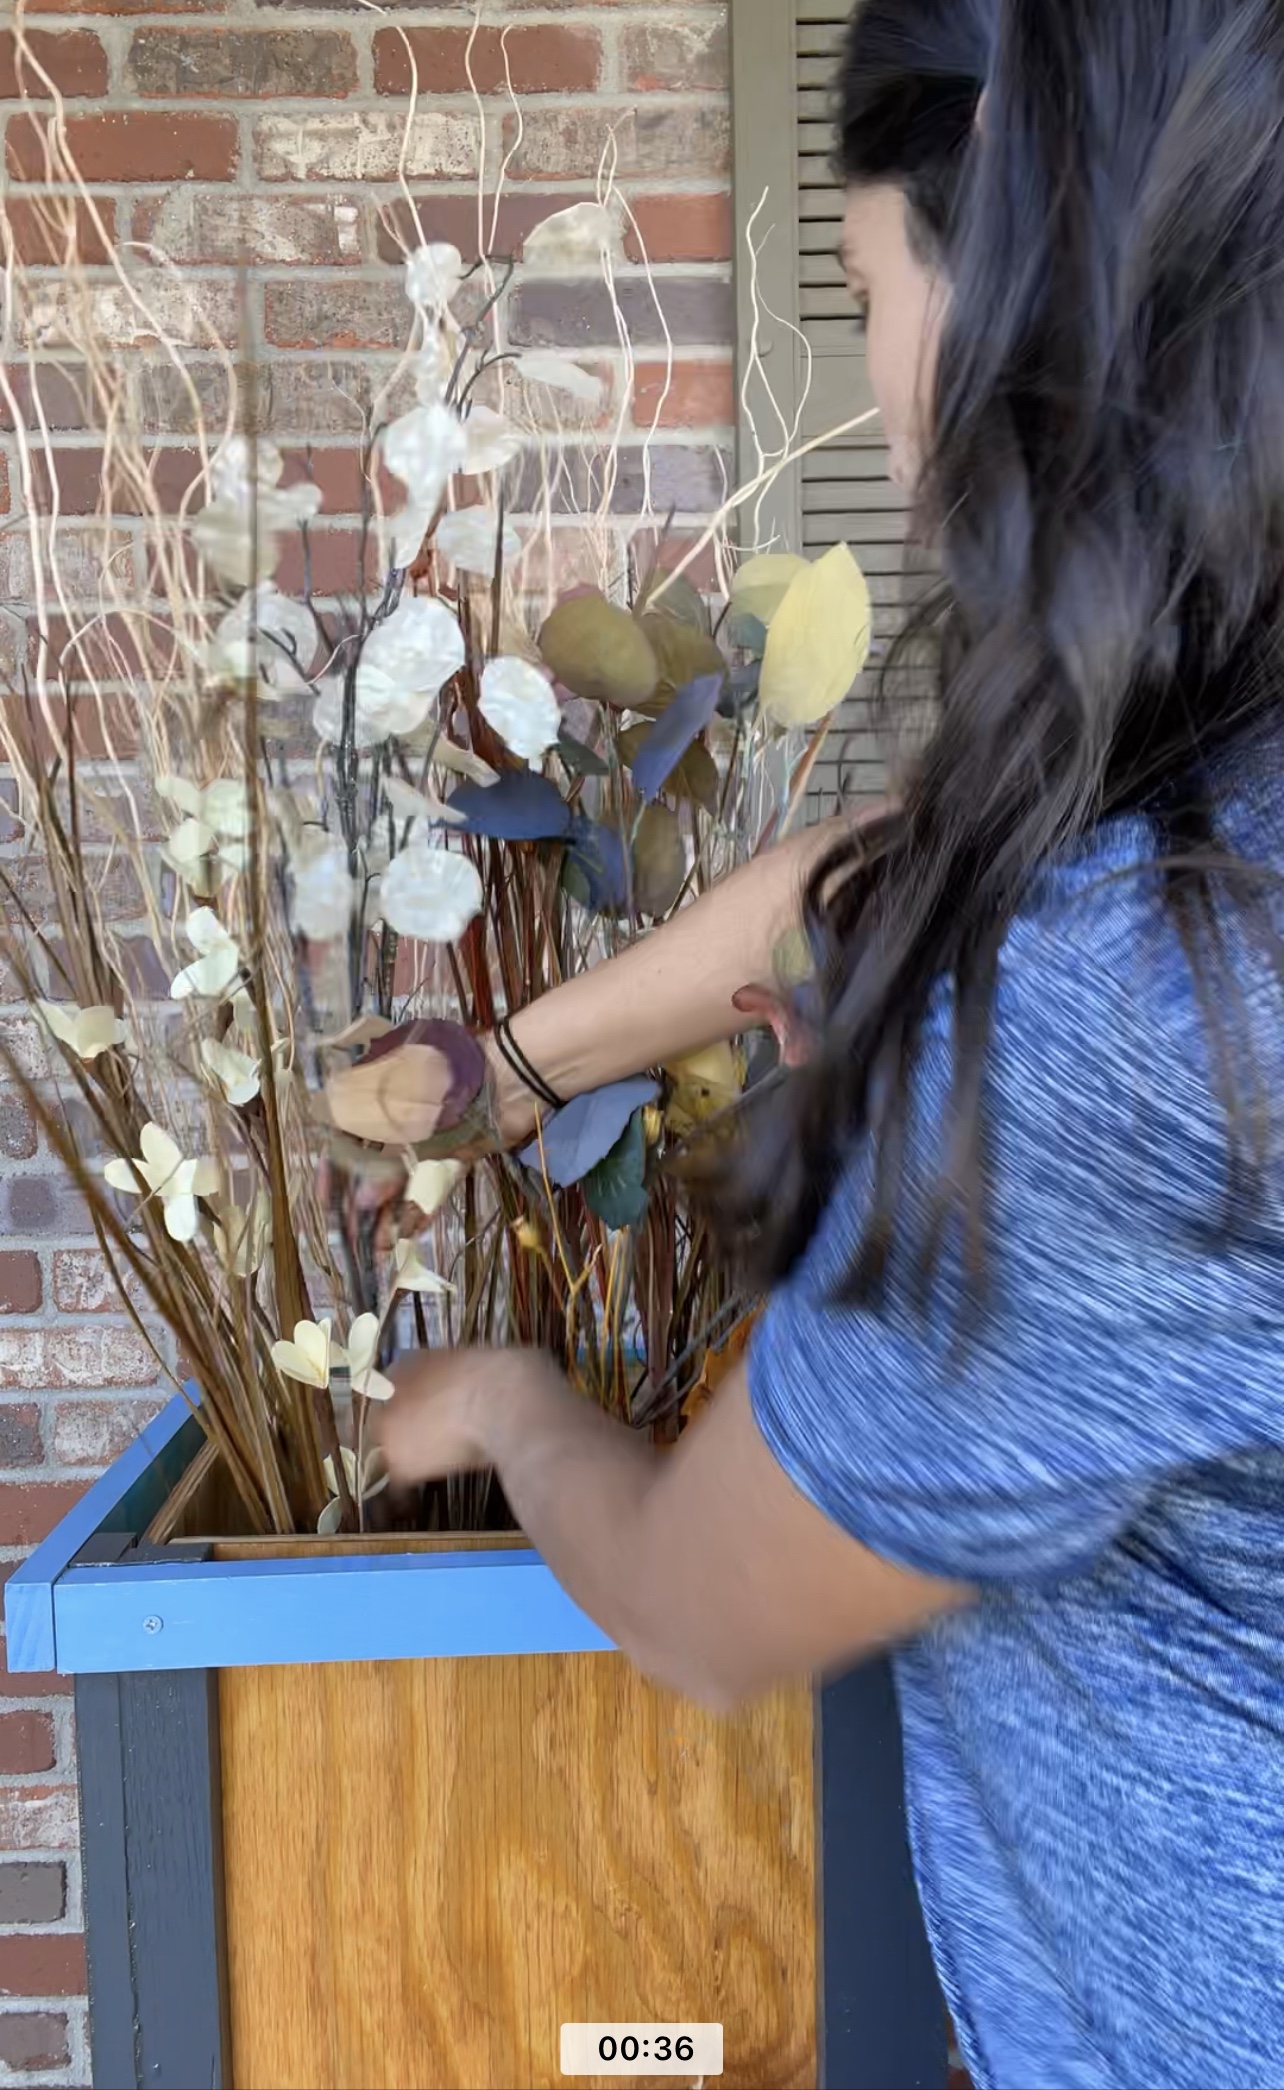
In order to create the floral arrangement, I first created the base first. I wrapped green floral foam in chicken wire and put it in the first shelf of the planters.

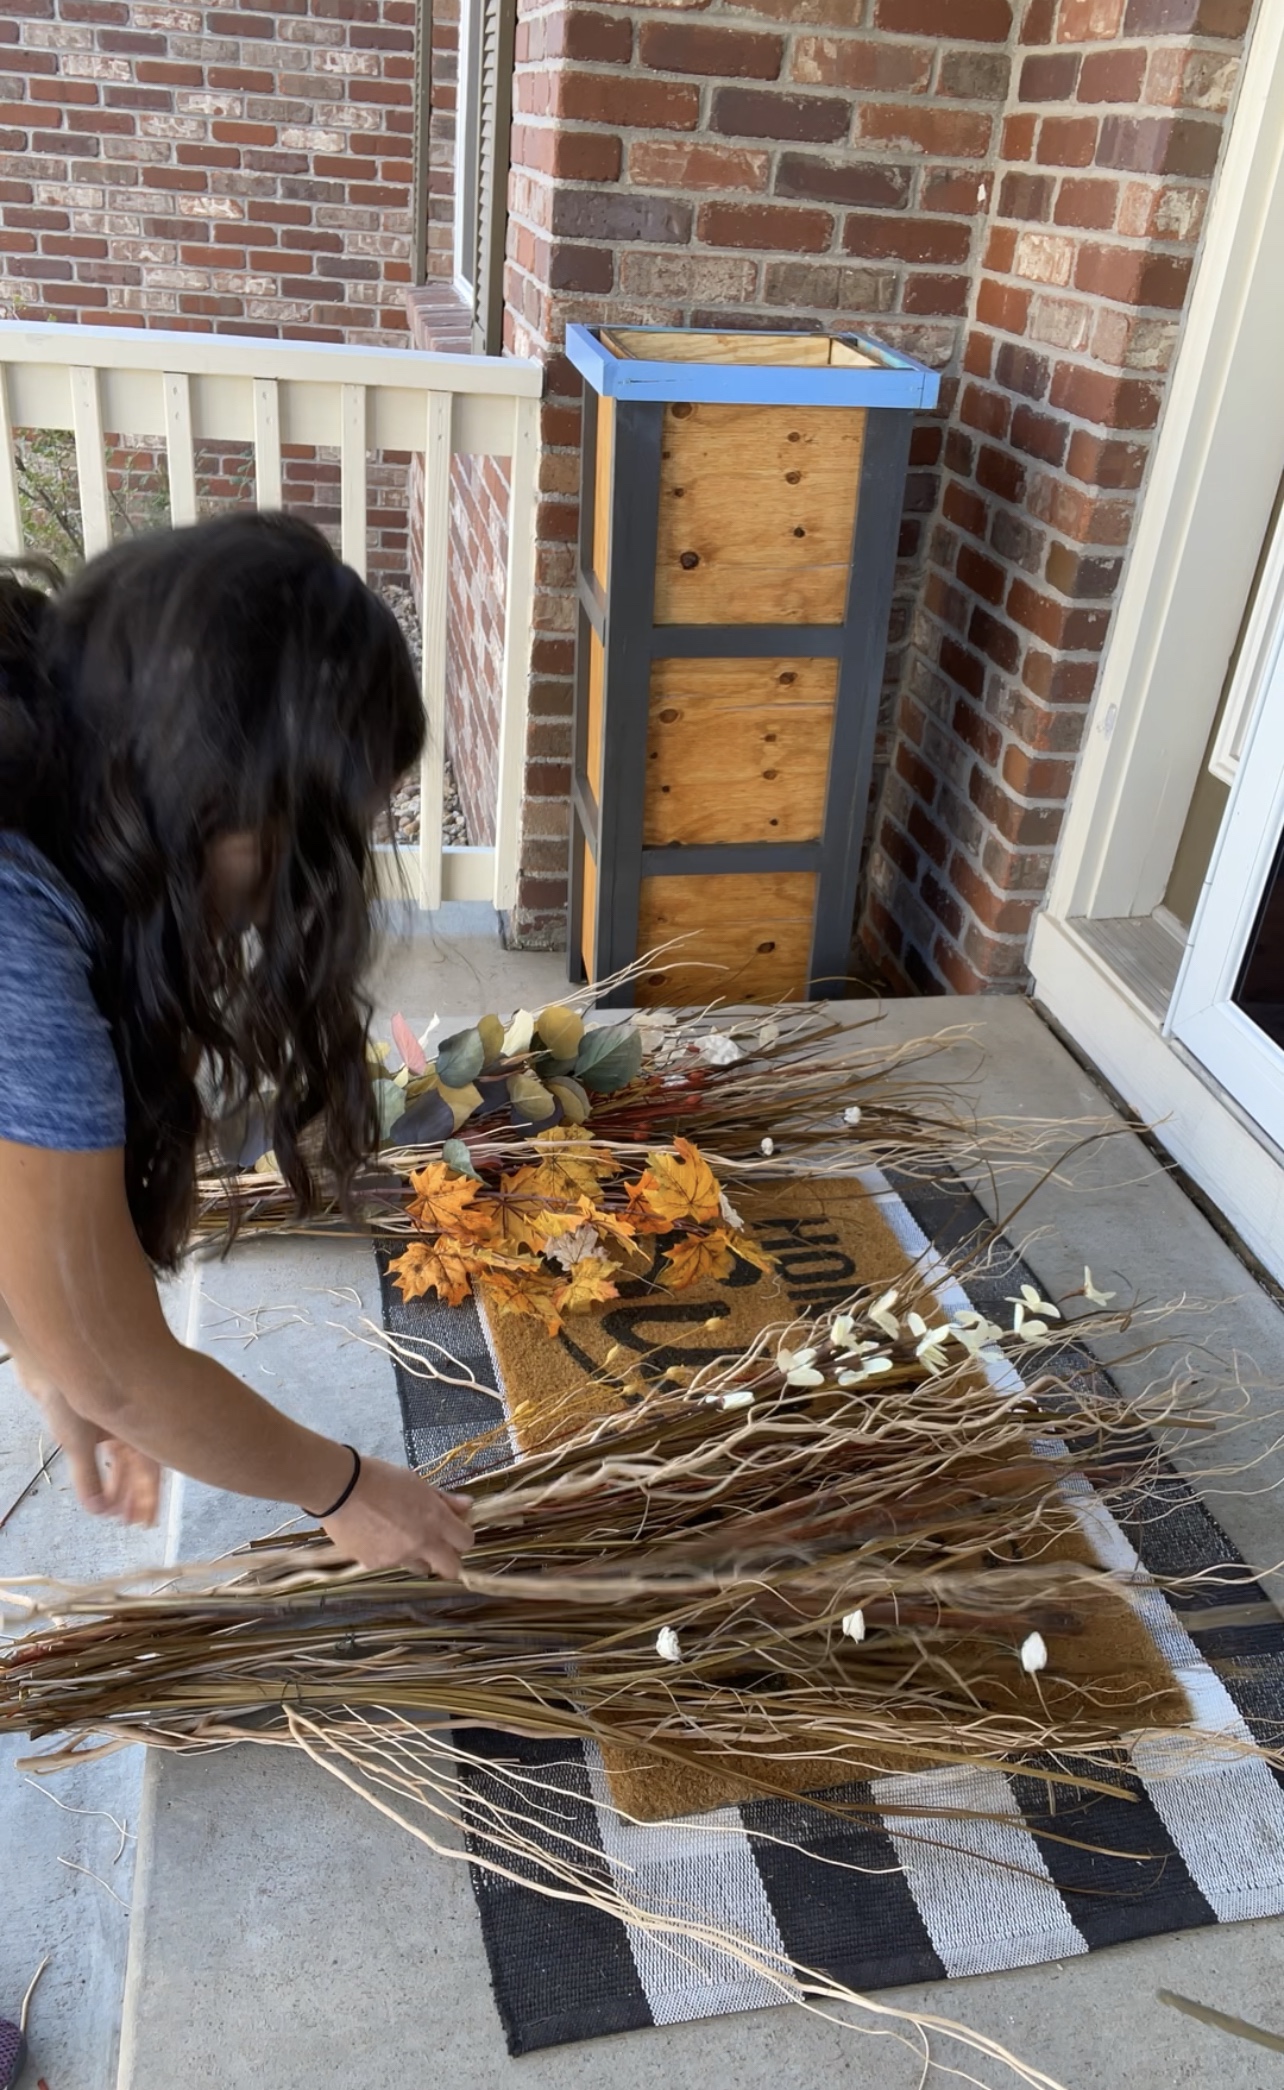
I created the floral arrangement outside of the planter first for each planter first before I put them in the planter. Once I arranged the flowers, I started placing them in the planter keeping the same arrangement. This way I can make sure I liked the arrangement before I placed it in the planter.
Here is how the front Porch turned out